Showing posts with label Vegetable Recipe. Show all posts

Thursday, April 17, 2014

Homemade Tacos


Today, I will be sharing how to make homemade, delicious Mexican Tacos.

This is yet again another favorite for me. This is our own version of the famous mexican classic, a delicious Mexican food that is flavorful and spicy that's guaranteed to satisfy your appetite.

The ingredients that we used are pocket-friendly without sacrificing the taste and quality. For example, instead of taco shells that can be bought from the market, we used lumpia wrappers. The lumpia wrappers are cheaper but equally crunchy and good tasting.

What's more is that it's guilt free! You can have big servings of it and you don't need to feel guilty about it. It's low in carbohydrates and high in fiber, vitamins and minerals. Good for our health, our tastebuds and our tummy, too! Hope you'll like it!


INGREDIENTS:
- 1 whole cabbage
- 10 pcs slightly ripened tomatoes
- 2 cucumbers
- 1 180g pack cheddar cheese, grated
- 20 pcs lumpia wrapper
- 1/2 cup cooking oil

For the Taco Meat:
- 1/2 kilo ground pork or beef (I only used pork)
- 2 tbsp cooking oil
- 2 cloves garlic
- 1 medium onion
- 1 tbsp atsuete powder
- 4 tbsp water
- 3 tbsp taco mix
- salt and pepper, to taste

For the Taco Sauce:
- 500 mL water
- 1/2 cup sweet and spicy banana ketchup (UFC)
- 1/2 cup brown sugar
- 2 tbsp cornstarch
- pinch of salt, to taste
- chili powder (optional only and adjust according to desired spiciness)


STEPS:
1. Mix well all the ingredients for the taco sauce in a small pot. Bring to a boil over medium heat, stirring occasionally until thickened. Set aside.
2. Slice the cabbage thinly. The thinner, the better [as shown in the picture at the right]. Set aside. Note: I like the cabbage better than the lettuce because of its taste and crunchiness but you may use lettuce.
3. Dice the cucumbers and tomatoes as displayed in the pictures. Set aside.
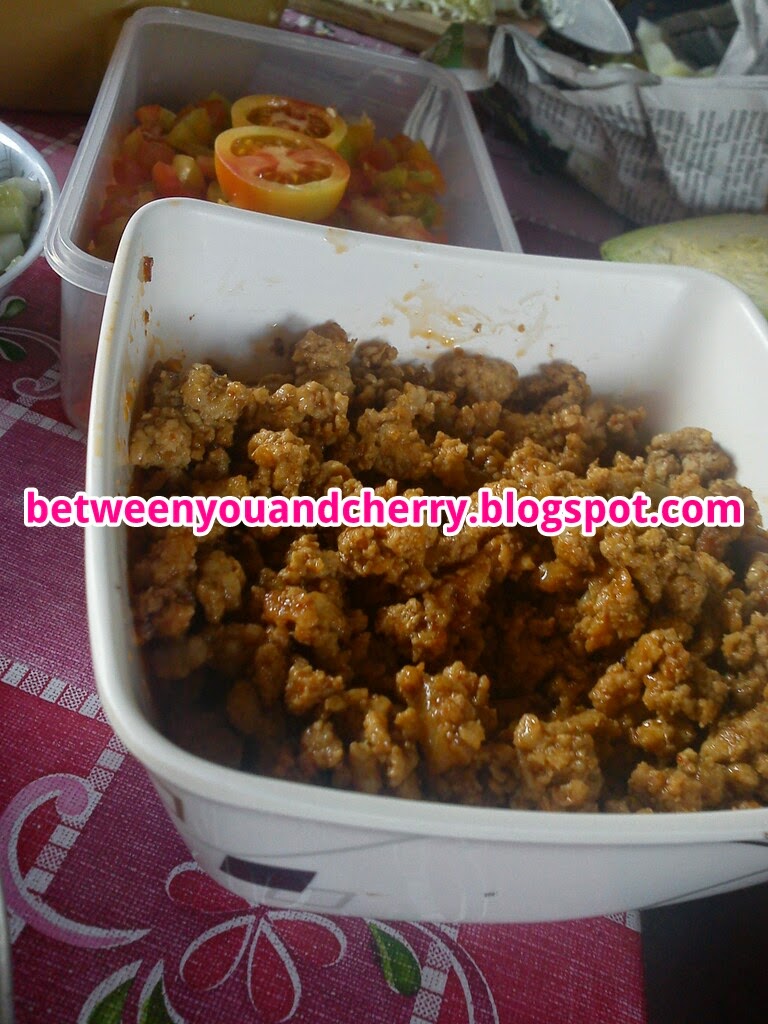
Taco Meat4. Next, we will saute the taco meat but first, we need to dissolve the atsuete powder in 4 tbsp water, set aside. In a medium skillet, heat the oil then fry the garlic into golden brown. Add the onions and let it caramelize then add the ground pork, atsuete mix, taco seasoning then add salt and pepper to taste. Stir occasionally until well done. Set aside.
5. In this step, we will fry the lumpia wrappers so that they will resemble the commercially available taco shells. I like to prepare the wrappers at the last part, just before serving the tacos, because I want them really crunchy. In a frying pan, heat about 4 tbsp of oil over low heat only because the wrappers cook very quickly. Using your kitchen tongs, hold half of the wrapper upward while letting the other half fry flattened in the pan, until golden brown. Then turn the wrapper so that you will be holding the fried half and curve it at a 45 degree angle and let the other half fry flat into a golden brown. When done, place in a drying rack to drain excess oil. Continue doing this until you are done with the 20 wrappers.
6. Now, all that's left to do is assemble the tacos! Get one taco shell, put 2 spoonfuls of cabbage at the bottom, 1 tbsp each of cucumber and tomatoes, 2 tbsp of taco meat then top with cheese. Serve with sauce on the side.

Tadaaah! And that is our homemade version of the famous tacos. It's quick, easy on the pocket and delicioso!

So I hope you enjoy this and let me know how yours went. Happy eating!

I'd like to hear from you! What do you guys think about my post? Your comments and suggestions are very much welcome and appreciated! Or if you'd like to request a recipe, please let me know. Thanks!


TAGS: Between You and Cherry, Cherry Yutuc, Panlasang Pinoy, Pampanga, Lutong Kapampangan, Budget friendly, Cooking Tips, Pampanga's Best, Recipe, Pampanga Cuisine, Cook from Pampanga, Philippines, Asian Food, Pinoy Food, Mexican Food, Homemade

Wednesday, April 02, 2014

Squash and String Beans in Coconut Milk

(Ginataang Kalabasa at Sitaw )


How are you doing today? If you'll ask me, well my tummy is super happy. I have been craving for ginataang kalabasa and sitaw (Squash and String Beans in Coconut Milk) for days and finally, my craving was satisfied today. Let's just say it was so delicious that I had more than 1 serving of rice and let's not get into further details with that, please. Lol!

Ginataang Kalabasa at Sitaw 
Let me share the top 3 reasons why I think you should try this recipe. First, it's good for our health. Kalabasa (yellow squash) is rich in beta carotene that helps in repairing cells damaged by free radicals while sitaw (string or snap beans) is high in fiber that helps regulate bowel movements and lower cholesterol. And these are just a few of the many benefits of these vegetables. Coconut milk or gata, on the other hand, is also rich in vitamins and minerals that aid in bone health and prevent anemia. Secondly, this recipe is easy on the pocket because I only used dilis or dried anchovies and shrimp paste instead of pork and shrimp. And last and certainly not the least, is its palatable taste. The rich flavor of the coconut milk and squash mixed together with the saltiness of the anchovies and shrimp paste, all blended well into a sumptuous creamy flavor that just leaves you craving for more. It's just mmm.. mmm.. Gooood!

INGREDIENTS:
- 1 tbsp vegetable oil
- 2 cloves garlic, minced
- 1 small onion, sliced thinly
- 1 to 2 tbsp shrimp paste (please adjust accordingly to taste as some pastes are too salty or )
- 1 cup water
- 1/2 cup dilis (dried anchovies)
- 2 pcs long chili peppers (siling pang sinigang), cut into 1 cm long
- 1 bunch string beans or sitaw, cut into 2 inches long
- 1/4 kalabasa, cut into 1x1 inch squares
- 1 cup thick coconut milk or gata (pure)
- 1 tsp black pepper, fine ground


STEPS:
1. Heat the large skillet over medium fire and toast the dried anchovies or dilis, stirring frequently until crispy. (Note: Do not put oil). Remove from skillet then set aside.
2. In the same cooking pan, heat the oil then saute the garlic and onion.
3. When the onions are caramelized, add in the shrimp paste and cook well. You may use either sauted shrimp paste or not and please adjust the amount of paste you will use, according to taste.
4. Add in the water and bring to a boil. It is important to let the water boil first before adding the vegetables so that the vegetables will retain their fresh colors.
5. Once boiling, put in the string beans, squash and chili peppers. Add in the ground pepper. Bring to a boil and do not cover. Again, I advice against covering because it destroys the color of the vegetables. Stir occasionally to ensure that the vegetables are all cooked evenly. Let it simmer until the vegetables, specially the string beans, are halfway done.
6. Drop the anchovies in and add the coconut milk. Bring to a boil once more, stirring occasionaly; let it simmer for a minute and then turn off the stove.

Note: I like my string beans cooked just enough so that they are still crunchy and snappy. Keep in mind that even after you remove it from the heat, the vegetables will continue cooking from its steam. But if you'd like yours to be well cooked, you may extend your simmering time accordingly.
And we are done! The best part, of course, is the taste test.

So I hope you enjoy this and let me know how yours went. Happy eating!

I'd like to hear from you! What do you guys think about my post? Your comments and suggestions are very much welcome and appreciated! Or if you'd like to request a recipe, please let me know. Thanks!


TAGS: Between You and Cherry, Cherry Yutuc, Panlasang Pinoy, Pampanga, Lutong Kapampangan, Budget friendly, Cooking Tips, Pampanga's Best, Recipe, Pampanga Cuisine, Cook from Pampanga, Philippines, Asian Food, Pinoy Food